How to Build a AirCrete Earth Pizza Oven
 Earth Pizza Oven
 The ancient Egyptians used earth ovens and examples have been unearthed in Roman Pompeii that would still work today if cleaned out and fired up. Ovens like these were built in communal areas and shared by families. By Medieval times, the ovens had become bigger and were used to bake bread for entire villages. Many Italian homes had wood-fired ovens inside up until the middle of the 20th century.
Oven Base
 The base is built on top of a 275 Gallon IBC cage. The IBC cage is turn upside down and the bottom is removed. The bottom is modified to add 9 inch wheels. These wheel makes the Earth Pizza Oven movable. Since Rain is the enemy of earth, the Wheeled Earth Pizza Oven can to rolled under cover when not in use and out of the rain.
After the bottom is modified with the wheels, then is attached to the IBC cage. Place the IBC cage on it wheels and start make the Oven Floor.
.
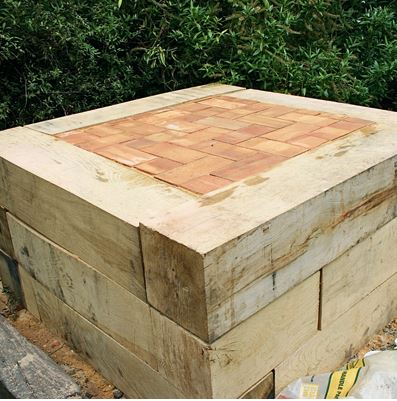
Build the Oven Floor
The firebricks are what your food rests on to cook; this is important because you want the firebricks to be as close as possible to one another so that they don’t shift. Normally a firebrick is exactly 9 inches X 5 inches. The oven floor is 5 firebricks long and 9 firebricks wide. A platform must be made exactly 45 inches X 45 inches with an edge equal to ½ the height of the firebrick. Lay one brick, kiss the edge of a second to the top edge of that brick and slide down until it sits flush.
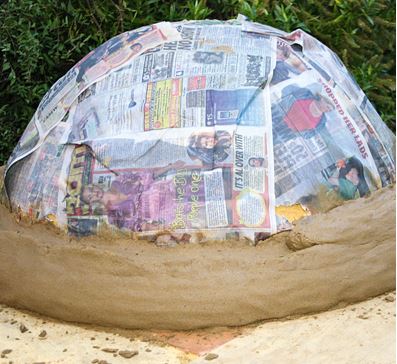
Form the Oven Interior
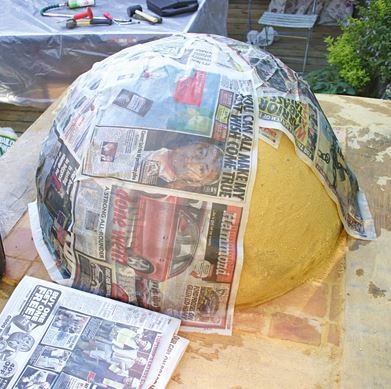 Soak a bunch of sand and form the interior of the oven to be dug out later. The width and height should be as planned; the rest should be essentially bell shaped. Cover this with wet newspaper prior to putting on the thermal layer.
.
.
.
.
.
.
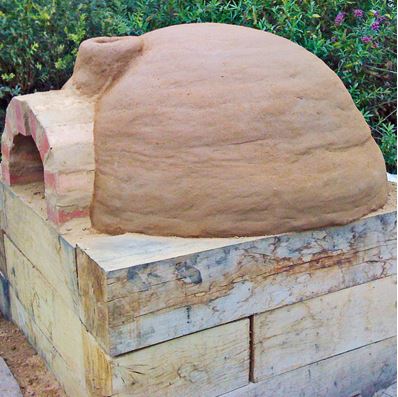
Build the Thermal Layer
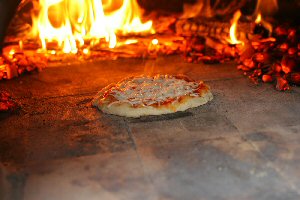
 The oven’s thermal layer holds the heat from your fire long after it is gone so that you can cook delicious pizza.
For the thermal layer, we needed 1 part clay, 3 parts sand, and enough water to make it easy to form but not so much that it was wet. The test for the right consistency was forming a golf ball sized bit of it and dropping it from wait height without seeing cracks (too dry) or it splatting (too wet). Experiment by digging up the clay, putting some shovelfuls on a tarp, throwing some sand and water on it and dancing all over with your feet, if you want it slightly less dirty, fold the tarp in half over the mix and dance on the tarp. Once you pass that golf ball test, get to layering.
The thermal layer was about 3″ thick. Formed mud bricks and smashed them together, then compressed with a board.
Cut a Door
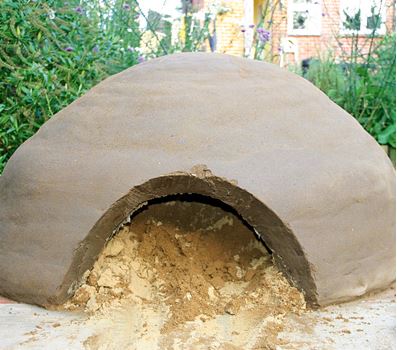 The door height: interior dome height is important so air can be drawn in for the fire to get hot. The door should be approximately 63% of the height of the inner dome the top of your wet sand form.
Build the AirCrete Insulation Layer
 The AirCrete insulation layer makes the oven cool slowly so you can cook stuff.
AirCrete … The insulating R-value of an Air Crete block is between 3 – 6 . You control the R-value by the ratio of cement to foam mixture. This ratio can cause the R-value will be 3 – 6 per inch. Be aware that the overall R–Value of the Pod will be diminished with fewer air bubbles and more cement. With the ratio of air bubbles to cement for our 5″ Block gives us a R value of 30.
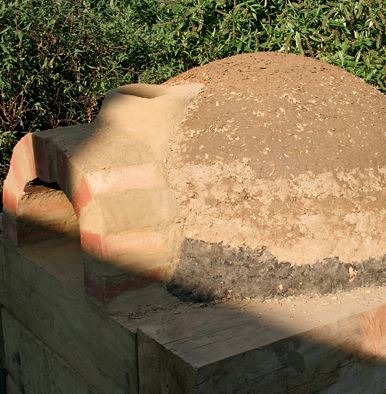
Coat With a Finishing Layer
The initial plan for the finishing layer advised adding straw but we chose to forgo and use a sand/clay mixture to smooth everything out. We poked little fingertip bumps in it because we were unsure if we wanted to do a plaster layer after it dried and wanted the plaster to have something to hold onto just in case.
Drying
You can build a series of small fires over time to assist in drying it out faster. The smaller bits of wood worked better in drawing in air than the larger kindling. Heated the oven up with constant fire for about 3 1/2 hours.
Once enough time had passed and the oven was hot to the touch on the outside. Use an infrared thermometer to judge temperature.
Coat With Lime Plaster
 Two 5 gallon buckets of lime plaster will coat the oven. This give more protection than a tarp without having to build a roof for the oven.
82 Siletz Hwy Lincoln City OR 97367


You must be logged in to post a comment.